


Square and rectangular mirrors are among the most versatile design features you can introduce into a home. Hung vertically, they emphasise height and structure. Installed horizontally, they widen a space and anchor furniture below. The right rectangular mirror doesn’t just reflect a room — it reshapes it visually.
The Takara mirror range spans from compact 70x50cm sizes through to oversized 200x150cm statement pieces. With dual-orientation hanging points built into the frame or backing, Takara mirrors can be installed in either portrait or landscape format — giving you full flexibility before drilling.
Browse the full range here: Takara Rectangular Mirrors.
Part One: Why Choose a Square or Rectangular Mirror?
Portrait vs Landscape: two completely different visual effects
One of the biggest advantages of a rectangular mirror is orientation flexibility. The same mirror can dramatically change a room depending on how it is installed.
- Portrait orientation: draws the eye upward and makes ceilings feel taller. Ideal for bedrooms, dressing spaces, and narrower walls.
- Landscape orientation: visually widens a space. Perfect above sofas, fireplaces, sideboards, and console tables.
Because Takara mirrors include hanging plates on two sides, your installation decision directly affects both visual balance and wall load distribution.
From subtle accent to architectural feature
Mid-sized mirrors such as 120x95cm or 160x60cm work beautifully above furniture or as full-length dressing mirrors. Larger 200x120cm and 200x150cm models become architectural features in open-plan living spaces and master bedrooms.
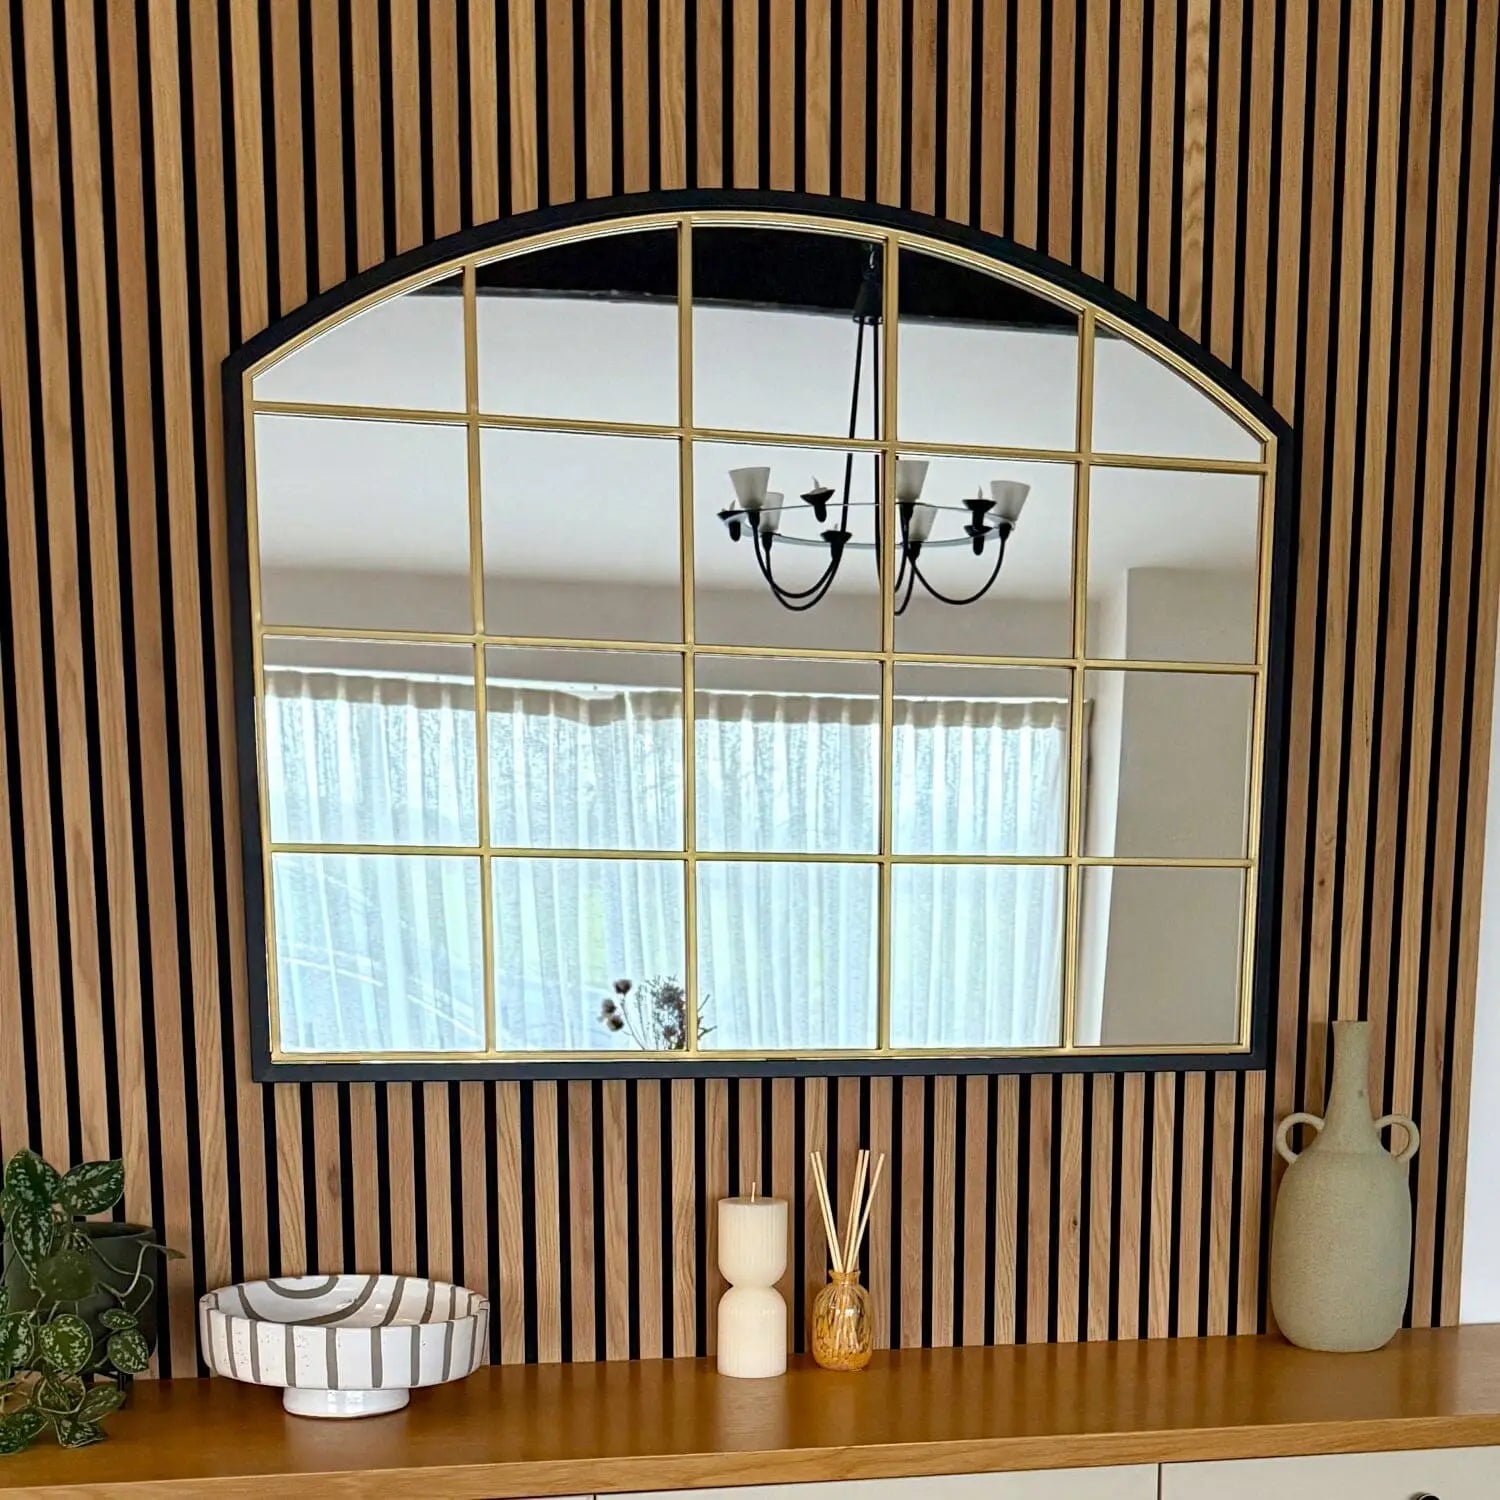
Featured Size: Takara 180x90cm Black Rectangular Mirror

The Takara 180x90cm black rectangular mirror works beautifully in portrait orientation for dressing areas, or landscape above wider furniture pieces.
- Dual-orientation hanging system
- Premium metal frame
- Balanced full-length proportions
Statement Size: Takara 200x150cm Gold Rectangular Mirror

The Takara 200x150cm gold mirror is designed for large-scale interiors. At this size (35.5kg), correct installation and load-rated fixings are critical.
- Oversized architectural scale
- Three fixing points per orientation side
- Engineered for stability
Part Two: How to Measure, Position, and Hang Your Square or Rectangular Mirror Correctly
Installing a square or rectangular mirror requires careful planning. Because Takara mirrors can be hung in either portrait or landscape orientation, your installation decisions affect both the visual balance of the room and the structural load distribution on the wall.
The steps below walk through orientation selection, precise measuring, hanger alignment, and correct fixing choice — ensuring your mirror sits level, stable, and visually intentional.
Tools and equipment you will need
- Spirit level (ideally a long level for wide mirrors)
- Tape measure
- Pencil
- Drill with correct bits for your wall type
- Screwdriver or drill driver
- Load-rated wall fixings and screws
- Stud finder (strongly recommended)
- Step ladder if required
- Vacuum cleaner or dust catcher
- Protective gloves
For mirrors over 100cm, use at least two people for lifting and positioning.
Pro tip: Lay a blanket or cardboard beneath the mirror while measuring to protect both the frame and your flooring.
1) Choose your orientation before you measure anything
This is the most important step.
Takara mirrors include hanging plates on two sides to allow both portrait and landscape installation. Once you drill, you commit to one orientation.
- Portrait orientation emphasises height and works well in bedrooms or narrow walls.
- Landscape orientation widens a wall and is ideal above sofas, fireplaces, or sideboards.
Do not measure from both hanger sets. Choose your orientation first, then completely ignore the unused hanger side.
Common mistake: Measuring from the wrong set of hangers and drilling unnecessary holes.
2) Decide the final visual position of the mirror
- Portrait: centre typically 150cm–160cm from floor.
- Landscape above furniture: leave 15cm–25cm clearance.
- Step back and assess symmetry with surrounding furniture.
- Consider reflections — aim for light and depth rather than clutter.
Pro tip: Outline the mirror shape using masking tape. For wide landscape mirrors, this quickly shows whether proportions feel balanced before drilling.
3) Understand the relationship between final position and hanger placement
You must mark screw positions based on where the mirror needs to finish visually and where the selected hanger plates sit relative to the frame edges.
With the mirror face down on a protected surface, measure:
- Horizontal distance between hanging plates (chosen orientation)
- Vertical distance from top edge of frame to hanger plates
- Total number of fixing points (2 minimum, 3 on 200cm models)
Transfer those exact measurements onto the wall using a spirit level.
4) Understanding the hanging systems
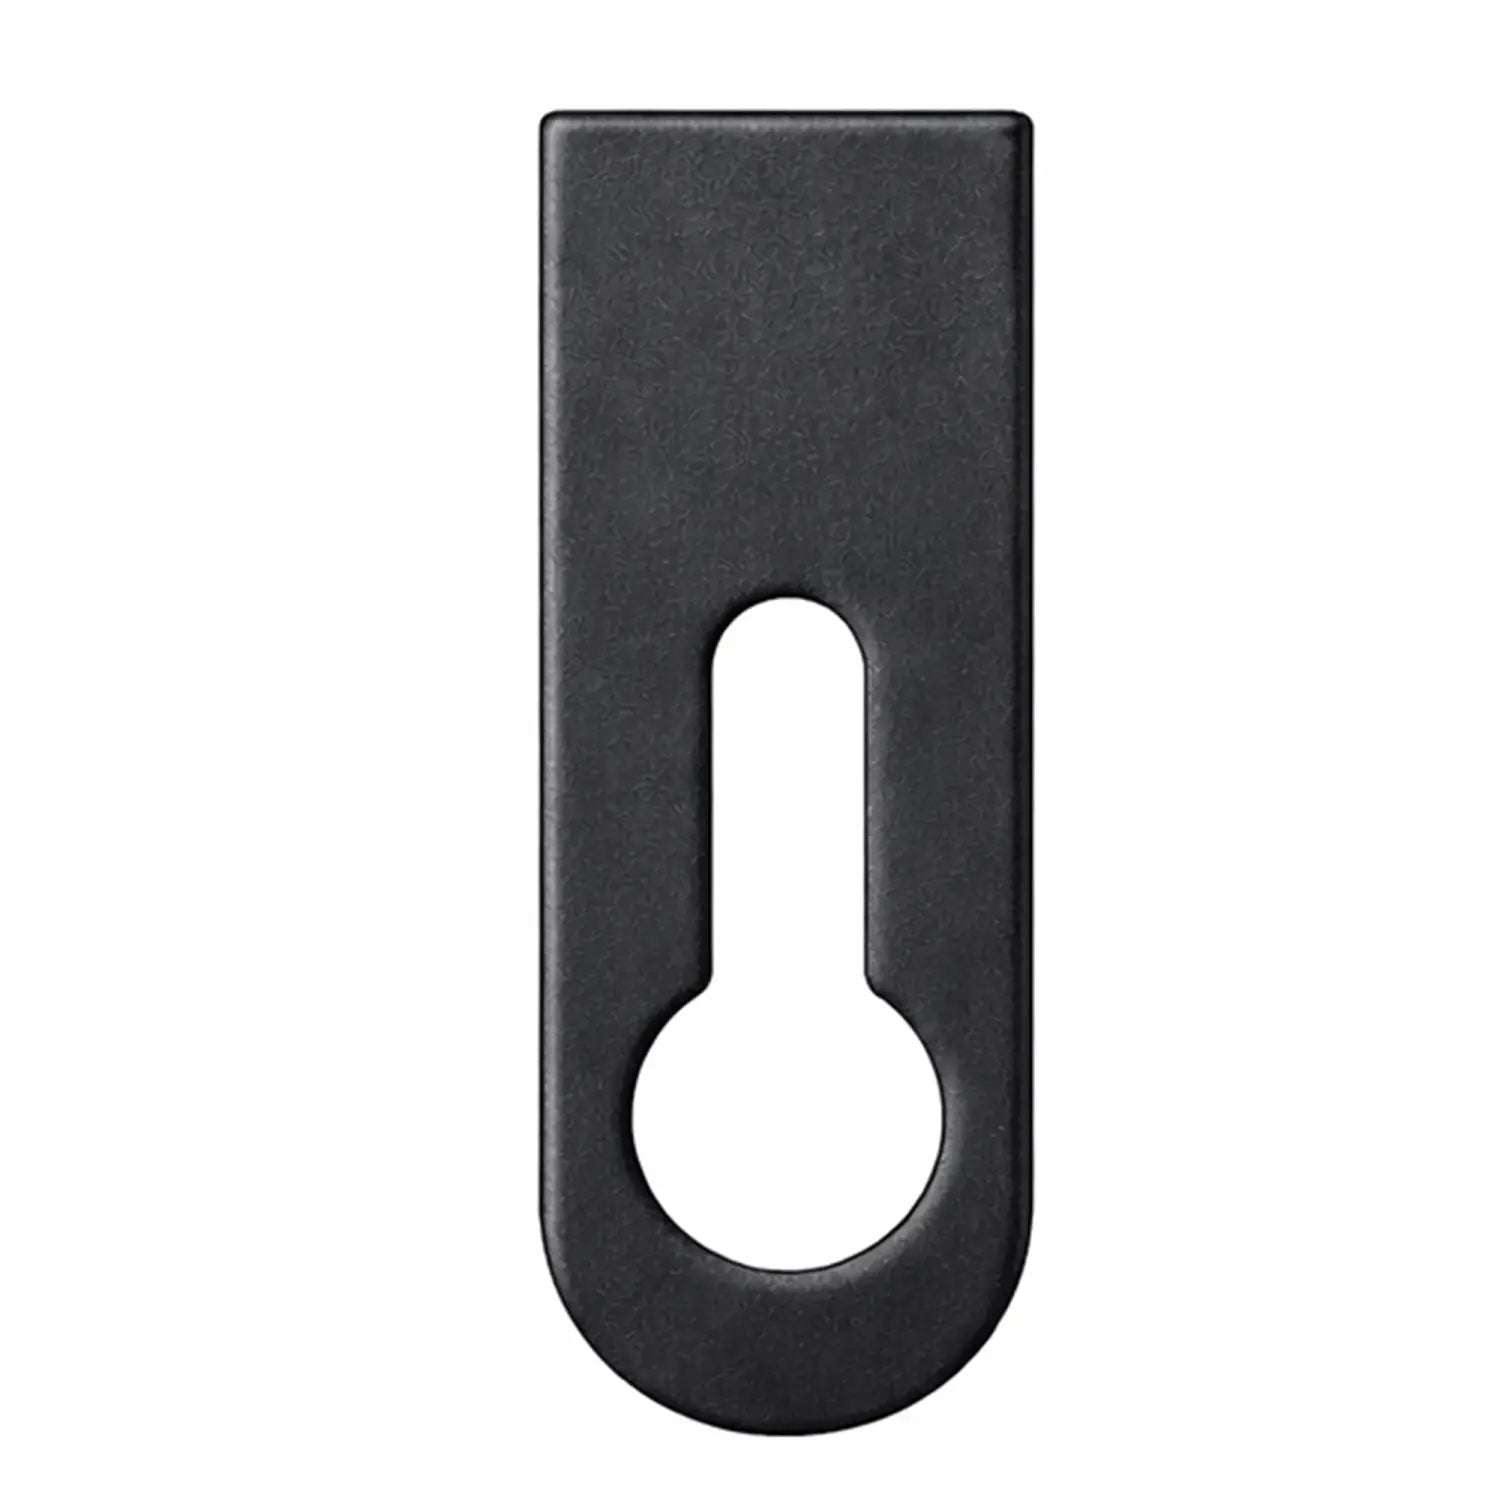
Keyhole Plate
|
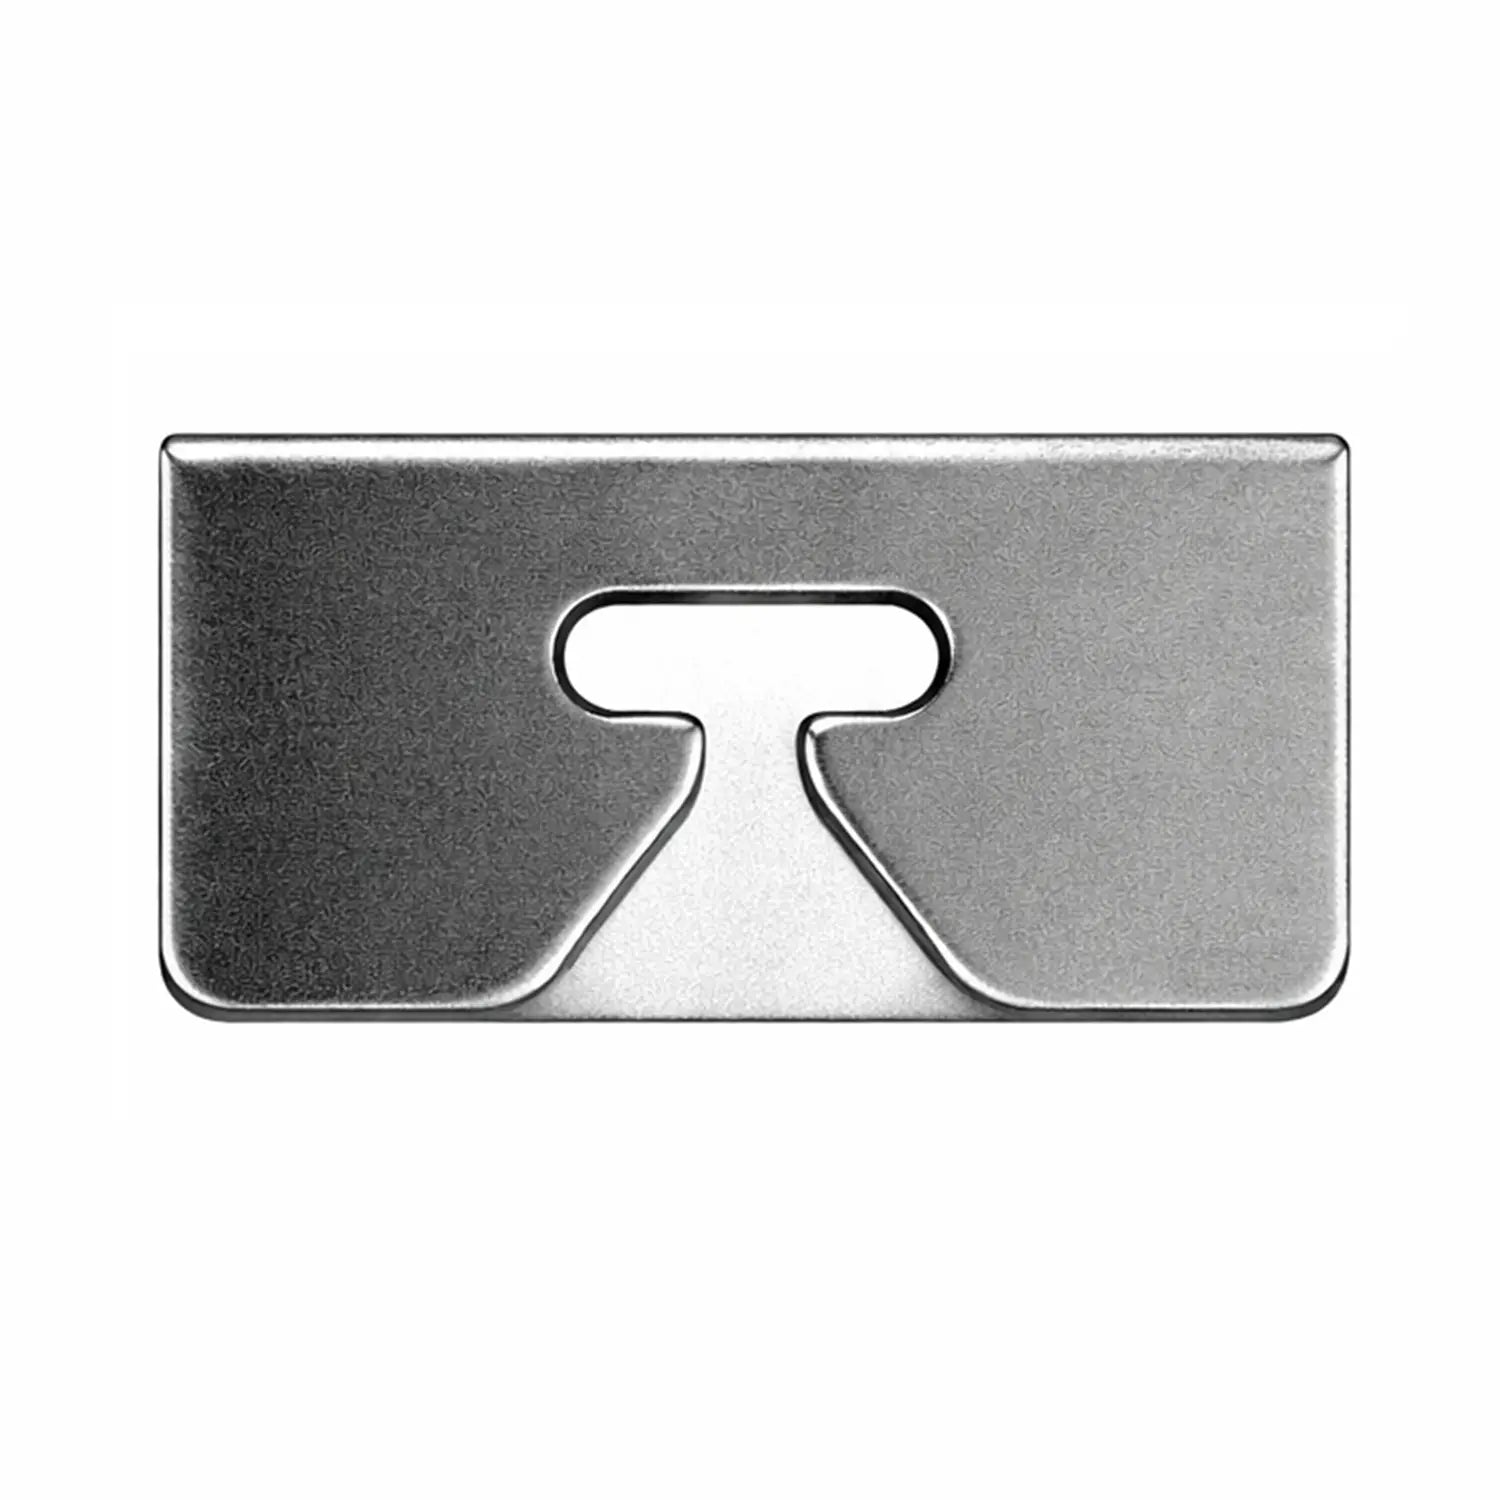
Reinforced Slot Plate
|
5) Allowing for slight hanger tolerances
Because hanging plates are hand-positioned, small millimetre variances can occur. Always level using the frame visually rather than relying solely on bracket spacing.
Across wide spans (150–200cm), even a 2–3mm deviation can be noticeable.
6) Selecting the Correct Wall Fixings (Type + Load Rating)
This is the most critical stage of the installation.
You must choose fixings that are:
- Suitable for your wall construction
- Load-rated above the mirror’s required weight per fixing point
Both factors matter. Choosing the correct fixing type but ignoring load rating can result in failure. Likewise, selecting a high-rated fixing that is not suitable for your wall type is unsafe.
Step A: Identify your wall type
- Brick / Concrete: Heavy-duty wall plugs with appropriately sized high-load screws.
- Plasterboard / Drywall: Heavy-duty cavity anchors or toggle bolts rated above required load.
- Stud wall: Fix directly into structural studs wherever possible (strongly recommended for large mirrors).
If you are unsure of your wall construction, do not guess. Seek advice from a qualified installer or specialist hardware supplier.
Step B: Calculate the minimum load per fixing point
Mirror weight ÷ number of fixing points = minimum load per fixing
- 200x150cm (35.5kg, 3 fixings): 11.83kg per fixing minimum.
- 160x60cm (15kg, 2 fixings): 7.5kg per fixing minimum.
- 120x95cm (18kg, 2 fixings): 9kg per fixing minimum.
Your chosen fixings must be rated comfortably above these values and suitable for your specific wall type. Do not select fixings rated exactly at the minimum requirement.
If you are uncertain about load calculations, wall strength, or appropriate fixings, consult a qualified professional installer. Improperly selected fixings can result in mirror instability or failure.
7) Drilling and preparing fixings
- Mark drilling points lightly in pencil.
- Apply masking tape to reduce surface chipping.
- Drill using correct bit size.
- Remove dust from holes.
- Insert plugs flush with wall surface.
- Insert screws leaving correct protrusion for hanger engagement.
8) Hanging and levelling wide mirrors
- Lift mirror carefully with assistance.
- Engage hanging plates fully onto screw heads.
- Check stability before releasing.
- Use a long spirit level across full width.
- Adjust screw depth if minor levelling correction is required.
9) Final safety checks
- Confirm mirror sits flush and stable.
- Check for any movement.
- Do not hang additional items from the frame.
- Keep children from climbing or pulling.
- Re-check fixings periodically.
- If unsure at any stage, consult a professional installer.

